Restoration of Jerred Ruble's
22 HP Minneapolis Steam Traction Engine
Click on the animated picture to go to the Animated Show Site.

|
Hello! My name is Jerred Ruble from
the North Central Iowa town of The Minneapolis Threshing Machine Company of |
![]()
|
|
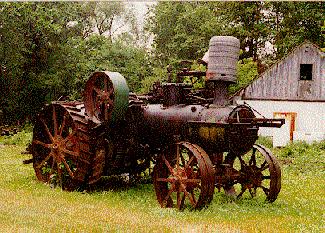
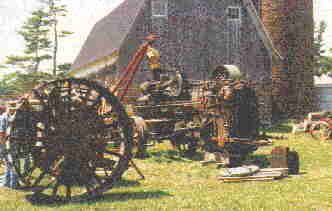
I knew it was going to be a major undertaken to see the engine run again. It had been sitting outside for well over 25 years without a wheel being turned. Although the smokestack had been covered, there had still been significant erosion on the bottom of the front flue sheet. A sonic thickness test of the rest of the boiler revealed it to be sound. I decided it to be a worthwhile project. |
![]()
|
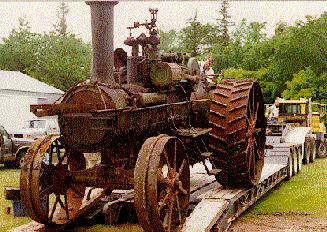
The first job was to transport the engine home to |
|
![]()
|
|
The engine sat outside at my farm near Hanlontown for the remainder of the
summer and fall while I tended to my job and made preparations for Steam
Threshing Days. In addition to repairing the front flue sheet, I also
wanted to replace all of the piping. So during one free weekend in October I
removed all the external piping and all of the old flues from the boiler. I
also removed the smoke box door and thoroughly cleaned out the boiler. The
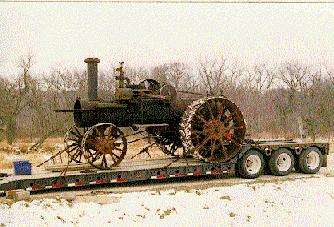
engine was now ready for the boiler repairs. However it was not until the
first weekend in January that anything else was done. On Sunday January 4th,
1998 Ole Maas brought Ron's lowboy over so we could haul the engine to Ron's
heated shop to work on the boiler. Seen here is the engine loaded ready for
the 15-mile trip to |
![]()
|
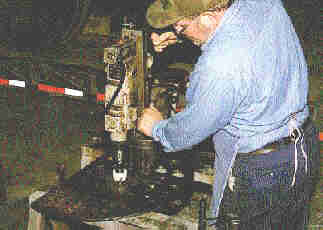
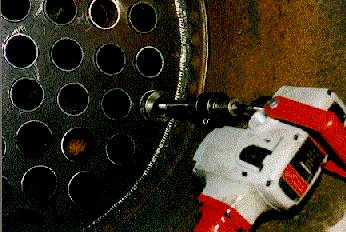
The following weekend we were ready to tackle the boiler repairs. First we
needed to remove the bad section of flue sheet. After contemplating repairing
only the section that was bad, I decided it would be a stronger repair job if
we removed the entire section that held the flues in place. Cutting the
section of flue sheet out went fast. We used the old section as a template
for properly positioning the flue holes in the new flue sheet. Once all
marked, the process of drilling the flue holes was started. We used a
magnetic drill with a 2 1/2-inch |
|
![]()
|
|
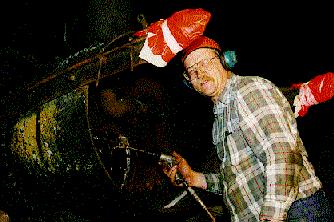
While the flue sheet was being drilled, Ole Maas was preparing the front end of the boiler for welding in the new sheet. He found the job to be both noisy and dirty. Yes, Ole is inside the boiler removing slag that was left when we cut out the old section of flue sheet. |
![]()
|
Duane Roll from |
|
![]()
|
|
The flue sheet was spot welded into place and made ready for the certified welder to finish the job. |
![]()
|
Welding the new section of flue sheet took about 3 hours. Here you can see the completed flue sheet ready for installation of the new flues. |
|
![]()
|
|
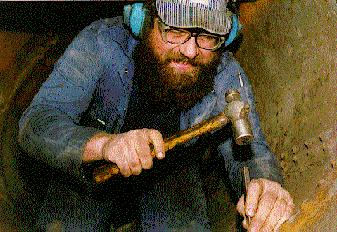
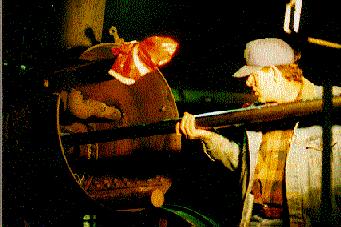
The next project was the installation of the flues. This job required cutting the flues to the proper length. The flues are cut so there is a 1/8" to 3/16" excess on each end. This excess will be blunted over or beaded later on in the process. Here you can see Norman Taylor feeding the flues from the front of the boiler to the rear. I happen to be in the firebox rolling the flues as we went. Each flue is rolled tight in both the firebox and the front smoke box. |
![]()
|
Lee Wyman from |
|
![]()
|
|
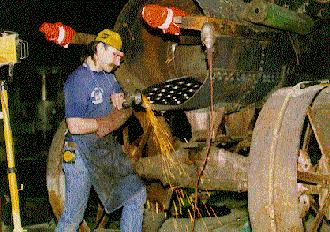
Each flue was then beaded. I like to bead both the firebox and smoke box ends of the flue. Although some say it is not necessary to bead the flue ends on the smoke box side, I think it looks much more professional when done. The reason the flues are beaded is to prevent the ends from burning off. I used a power air hammer for the beading, but had to build my own beading tool. It took several refinements to get the right shape, but once done the beading went good. Again, this was much faster then the manual tools I have used in the past that required lots of pounding with a hefty hammer. It took maybe a minute to bead each flue compared to the 10-15 minutes it would have taken with the old technology. |
![]()
|
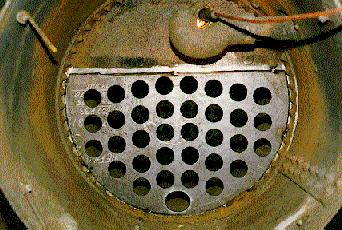
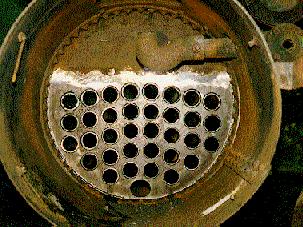
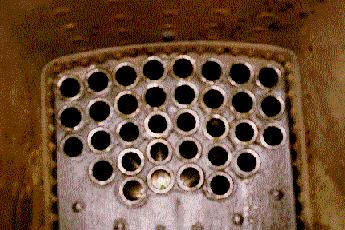
This is a picture of the front flue sheet with all the new flues rolled and beaded. |
|
![]()
|
|
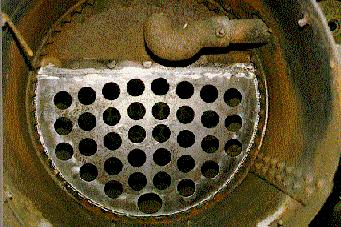
This is a picture of the fire box end of the boiler. A hydrostatic test of the boiler will be done before we attempt to fire up the engine. This involves pumping the boiler up with cold water to at least one and a half times the working pressure of the boiler to ensure that the boiler is safe. We had hoped to complete this before returning the engine to Hanlontown, but we just ran out of time, since Ron needed the space in his shop for manufacture of house moving dollies. |
![]()
|
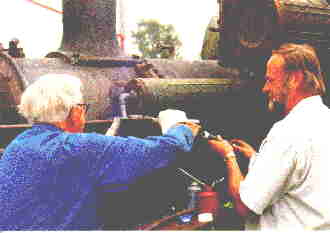
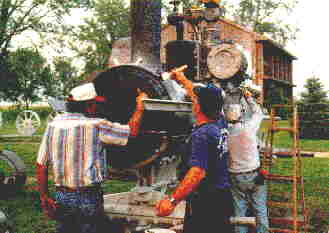
While welding was taking place, Norm, Ole and I decided to work on the engine a little. The engine was stuck, but after we loosened the crosshead shims the engine would turn but not all the way over. We decided we needed to look at inside the engine to see what was wrong. We removed the cylinder head, but could see no obvious problem. We next removed the piston and discovered that a mouse had somehow got inside the front part of the cylinder and made a nice cozy nest. You can see Ole removing the nest here. The piston sets on the inspection platform just below the engine. Actually it was good we removed the piston as both rings were stuck. After cleaning the cylinder walls, loosing the piston rings and making a new head gasket, we replaced the piston. We also inspected the slide valve to be sure there were obstructions as well. There was no problem so we replaced the valve cover. |
|

![]()
|
|
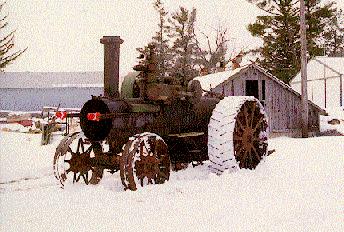
The next day we hauled the engine back home to Hanlontown. Unfortunately
the snow in my yard prevented me from getting it back into my shed. Guess I
will need to wait for the |
![]()
|
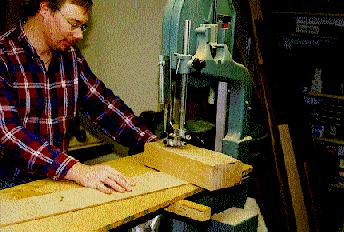
After resting for several weeks, it was time to get something done again.
I decided to work on the clutch. One of the clutch shoes had completely
rotted away, but there was enough left of the other to use as a pattern for
building two new ones. Fortunately one of my employees at work is an avid
wood worker and has a very well equipped woodworking shop. Originally the
shoes were made out of hard maple, but he did not have any on hand. We
decided to use beech that is equally hard. One night after work we set out to
build the new clutch shoes. Here you can see Bill Haun of |
|
![]()
|
|
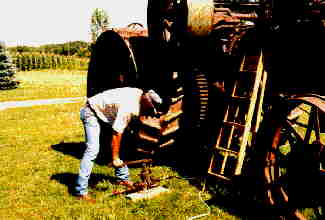
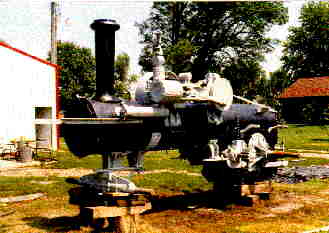
The project set for the rest of the winter and most of the spring. In June I pulled the engine around to the front of my shop and was ready to pick up the project. Remember the goal was to have the engine running by show time, which was mid August. This meant I had roughly 2 months. The first thing I did was to hydro the boiler. I decided to pump the boiler to 2 times its intended working pressure to be sure all repairs were in order. I used a hand pump as shown in this picture and pumped the boiler up to 200 lbs. of water pressure. I had 4 tubes in the firebox and one stud bolt which leaked a bit. After rolling the 4 tubes and tightening the stub bolt, the boiler was pumped to 200 lbs. After 15 minutes the pressure was around 150 lbs. I was satisfied the boiler would be safe to operate at 100 lbs. with no worry. |
![]()
|
I decided that the only way to effectively clean the engine was to partially dismantle it. The wheels came off first, followed by many of the smaller parts bolted to the boiler. This included the steering wheel, the clutch, throttle and reverse levers, the steering worm gears, the steering chains, the differential and pinion gears, and the inspection steps. My yard was transformed into a maze of steam engine parts. |
|
![]()
|
|
We started the tedious job of sand blasting. We used Norm Taylor's sandblaster that he made out of a propane tank. It worked great! Sandblasted took 2 weekends to complete. The wheels were the hardest and most time consuming to sandblast. That's Norm blasting with his blaster. As the parts were completed, Alan Kroneman primed them. The show was less then a month away at this point, but no one lost faith that we would not make it. |

![]()
|
While Norm did the sand blasting, my brother Steven Ruble and his friend
Wally Orth from |
|
![]()
|
|
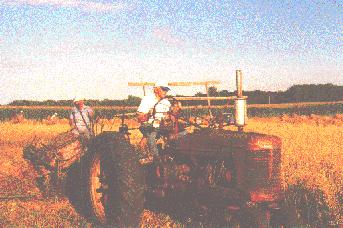
Of course the grain was ready to cut and shock about this time so we had
to take time out on the restoration project. The oat crop was bountiful this
year. The oats were heavy with good height. Here Marlin Hagan and Frank
Siedl, both from |
![]()
|
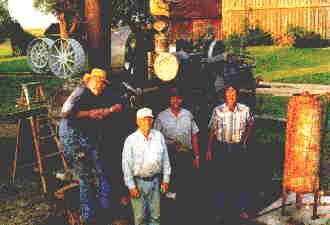
After the grain was cut and shocked, it was back to the restoration project. Here the blasting and cleaning crew stop for a brief picture moment. From left to right, Bill Haun, Allan Kroneman, Jerred Ruble and Norm Taylor. Ron Holland is not in the picture as he is at the other end of the camera. You can see in the background that the wheels have been primed, ready for the red paint. |
|
![]()
|
|
Once the blasting and cleaning was done, painting was the order of the day. I am fortunate to have several good friends who where willing to lend a hand when I needed it most. On this day my crew consisted of, from left to right, Norm Taylor, Ron Holland and Allan Kroneman. |
![]()
|
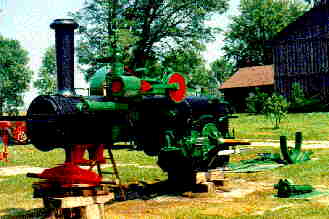
Boiler painted with high temp boiler paint and priming done. Two weeks before the show. I kept telling everyone that we would make it by show date and the engine would be running for the first time in 30 years. Did they believe me? I doubt it. Did I believe it? Most definitely not. |
|
![]()
|
|
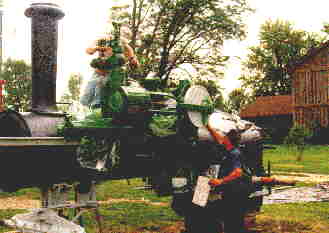
Painting continued for several days. We painted as much as we could by spray gun, but much had to be done by brush. Here Al has spray gun in hand with Ron Holland touching up with a brush. |
![]()
|
Painting done! Parts of the engine were still all over my front lawn, in my back yard and in my shop. Would the engine be back together and ready for first steam up in three days? |
|
![]()
|
|
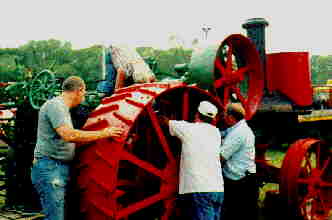
Once the painting was competed and dried, the reassembly process was started. Yes, the show was 5 days away when this photo was taken and we hadn't steamed it up yet. Boy was I getting nervous, but I certainly didn't want it to show. Fortunately the weather kept cooperating as Bill Haun, Al Kroneman, David Hall and Ron Holland reassemble the right rear wheel. It only took about a day and a half to get to back together. |
![]()
|
The reassembly was completed Wednesday night. We planned the first steam up for the next evening. Unfortunately we were so excited and anxious to see the engine run and move under it own power, we forgot to take any pictures of the historic first steam up. We had to forgo detailing the engine, but a lot of buttons were broken the first time the engine turned over. Norm Taylor had the honors pulling the throttle for the first time. Friday was spent getting other things ready for the show which is held right on my farm. It would not be until Saturday, the first day of the show that we would steam the engine again. We used the engine on the rock crusher doing the show. Needless to say the engine required a lot of TLC during the show, but we received many complements. We were all enjoyed a major sense of accomplishment. |
|
![]()
|
|
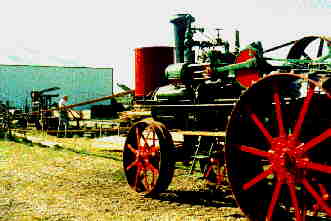
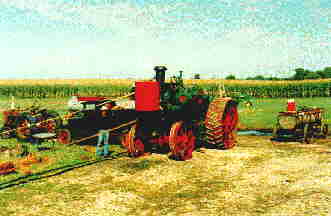
After the show we had on opportunity to do some serious playing with the engine. We sawed lumber on several different weekends. Each time tightening and tuning things up a little more. You will recall the engine was used on a saw mill for most of it's life. It was back to doing what it knows how to do best. |
![]()
|
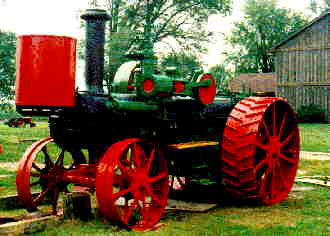
Here Norm stands beside the engine. Norm acquired the job of chief engineer for the engine. In the background you may be able to make out my brother's 1929 International truck. We use it for hauling wood. |
|
![]()
|
Well this concludes the restoration story of my 22 HP Minneapolis engine. It was certainly a fun project, but an impossible project without all the help I received from the people identified in the above story. I cannot thank Norm Taylor enough for all the time and effort he donated to the project. Special thanks also go out to Ron Holland, Al Kroneman, Ole Maas, Bill Haun and Duane Roll as well. I plan to have the engine detailed for the 1999 show. I'm looking forward to spring so we can once again hear the engine on the sawmill. |
![]()